
Table of Contents
Woodturning is a craft where you shape a piece of wood on a lathe. It lets you be creative and make beautiful things. I’ll show you the tools (headstock) and techniques to start woodturning in this guide. Learning the basics is essential for making valuable things or fancy decorations. Let’s explore this ancient craft and have fun with woodworking and experimenting with different grains.
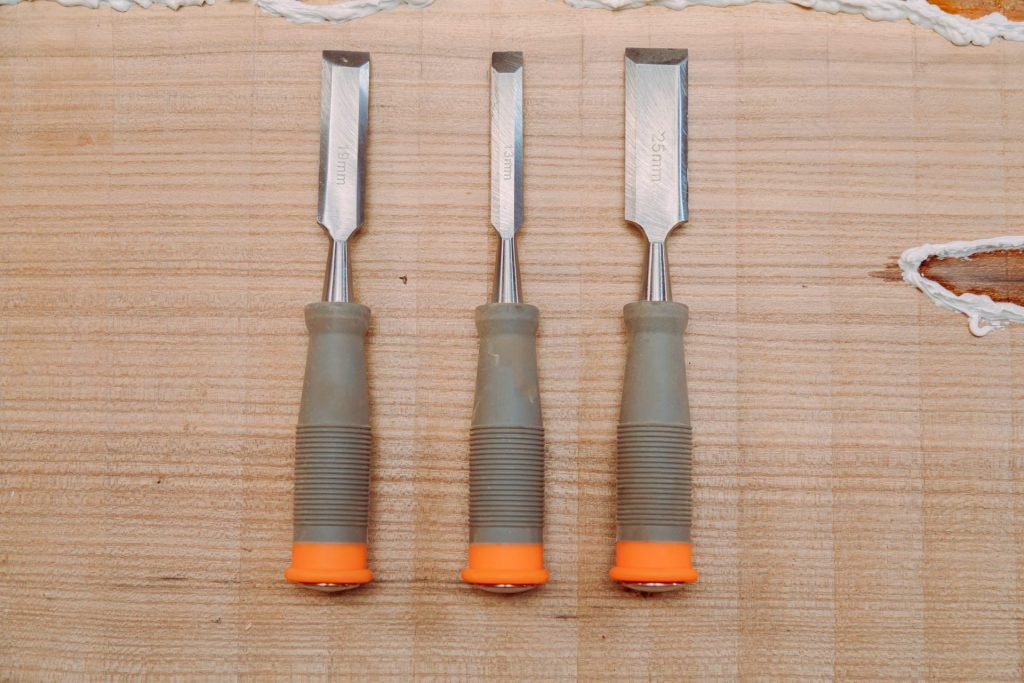
different types of Chisel
Find Wood-turning Basics and Tools
Primary Tools
Wood-turning involves using gouges and chisels as primary tools. With curved cutting edges, gouges are used to shape the wood grain. Chisels, for example, have flat cutting edges and are essential for making precise cuts in wood turning.
Understanding how to use these tools, such as the example and head, is crucial in wood-turning. For instance, gouges are commonly used to create concave shapes or coves, while chisels excel at creating flat surfaces or sharp corners in dry wood.
I find starting with a basic set of tools helpful when beginning my wood-turning journey. This usually includes a spindle roughing gouge, a parting tool, a skew chisel, bowl gouges, and dry wood.
Principles of Turning
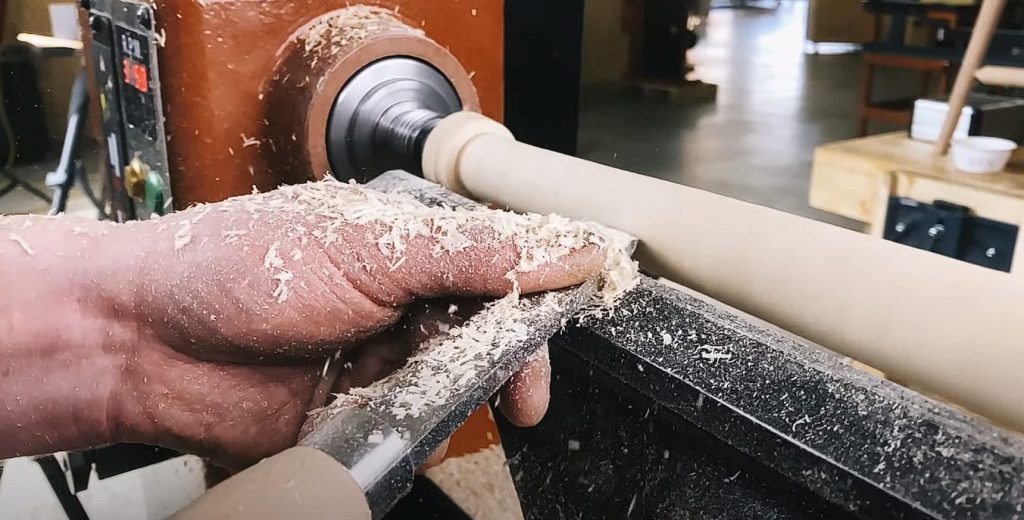
Spindle turning and faceplate turning are two fundamental techniques in wood-turning. Spindle turning involves working on long pieces of wood mounted between centers on the lathe. In contrast, faceplate turning requires mounting the workpiece on a faceplate attached to the headstock spindle.
When I first started learning about these techniques, I found it helpful to practice spindle turning before progressing to faceplate turning. This allowed me to grasp the basics before moving on to more complex projects.
Cuts and Techniques
In addition to mastering various cuts like peeling cut or slicing cuts during wood-turning processes,
Learning about different types of cuts has been an exciting aspect of my journey into wood-turning. Each cut serves a specific purpose in shaping the wood according to my desired design.

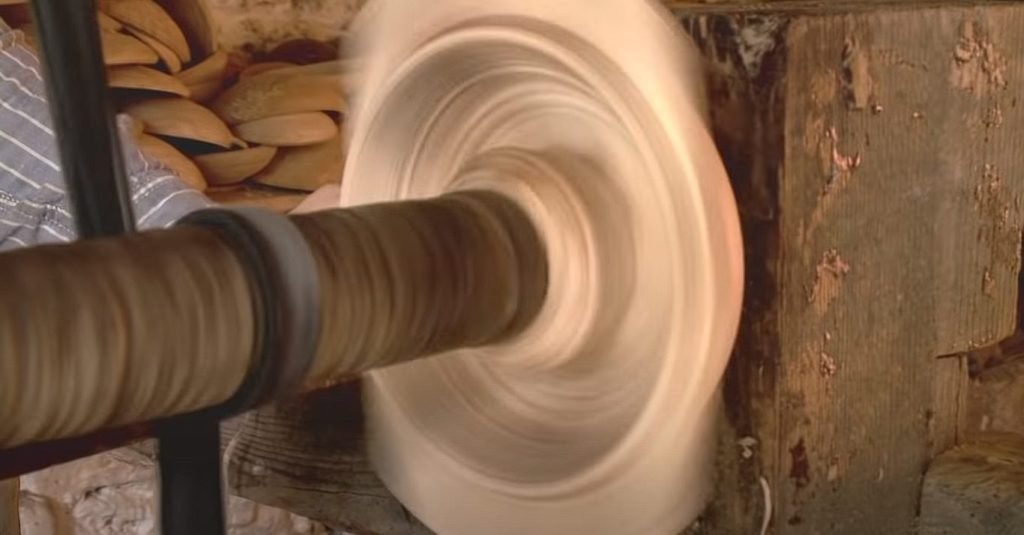
one type of green wood
Selecting the Right Wood and Lathe for Beginners
Right Type of Wood
Selecting the wood-turning wood for your projects is crucial when starting wood-turning. Different woods have unique characteristics that affect how they turn on a lathe and their final appearance. For beginners, it’s best to start with softer woods like pine or cedar, as they are easier to work with and less likely to cause accidents. These woods also allow beginners to practice basic turning techniques before moving to more challenging hardwoods.
When selecting wood, consider its grain pattern, color, and density. The grain pattern can add visual interest to your turned pieces, while different colors can create striking contrasts in segmented or multi-wood projects. Moreover, understanding the density of wood helps determine its stability during turning and whether it is suitable for intricate designs.
Selecting a Suitable Lathe
Choosing a suitable lathe is equally essential when starting wood-turning. Budget, availability of wood-turning, and desired project size should influence your decision. As a beginner, opting for a mini or midi lathe might be ideal due to their affordability and compact size, making them suitable for home workshops or small spaces.
Moreover, look for lathes that offer variable speed control. This feature allows you to adjust the speed according to different types of wood and project requirements. This flexibility is especially beneficial when experimenting with various turning techniques as you progress your skills.
In my experience, experimenting with different types of softwoods helped me gain confidence in handling essential tools like gouges and chisels effectively before advancing to harder woods like maple or oak.
Setting Up Your Lathe for Wood-turning Success
Proper wood-turning ensures optimal performance. When starting wood-turning, setting up your wood-turning correctly is crucial. Begin by checking the alignment of the headstock and tailstock. The headstock holds the motor and spindle, so it needs to be perfectly aligned with the tailstock for smooth operation. Use a straight edge or aligning tool to make sure they are parallel.
When setting up your lathe, you also need to focus on stability. Ensure the lathe is placed on a sturdy, level surface to prevent wobbling or vibrations during turning. This stability is essential for producing precise and consistent cuts while minimizing safety risks.
I find that taking extra time during this initial setup phase pays off in smoother operation and better results later on.
Speed Settings and Workpiece Security
Adjusting speed settings on your lathe is another critical step in achieving wood-turning success. Differwoodturningf wood requires different speeds for optimal results, so familiarize yourself with changing these settings based on the project.
Securing workpieces effectively is also paramount for safety reasons and quality outcomes. Whether using a chuck or faceplate, ensuring that workpieces are securely fastened will prevent accidents and guarantee a more controlled turning process.
Remember: Safety first! Always wear appropriate protective gear, such as goggles and dust masks, when working with lathes.
Mastering Fundamental Wood-turning Techniques
Essential Woodturning techniques
To start wood-turning, it is crucial to use different techniques like roughing, shaping, sanding, and finishing. Roughing involves turning a square piece of wood into a cylinder using a roughing gouge. Shaping allows you to create various forms by removing excess material, such as bowls, vases, or spindle work.
Sanding is essential for achieving a smooth surface on your turned pieces before applying the finish. It helps in removing tool marks and scratches left from the previous steps. Finishing is the final step that enhances the appearance and durability of your turned items by applying coatings like lacquer, oil, or wax.
Various Cutting Methods
Exploring different cutting methods is also vital in wood-turning. Shear scraping wood-turning sing a scraper at an angle to produce fine shavings while refining curves and smooth surfaces. The skew chisel technique requires precise control over the tool’s angle and presentation to achieve clean cuts without tear-out.
Practicing precision and control when creating decorative elements such as smooth curves, beads, and coves can be challenging yet rewarding in wood-turning. It allows me to turn into creativity while honing my skills.
Personal Experience
In my experience with wood-turning, I’ve found that wood-turning demands patience and practice to perfect. For instance, mastering shear scraping took time but significantly improved the quality of my finished pieces.
Prioritizing Safety in Your Wood-turning Practice
UndersWoodturningks
Wood-turning involves potent hazards that require careful consideration. Shaping wood using a lathe and hand-held tools can lead to flying debris, sharp objects, and fine dust particles. If proper safety measures are not taken, these hazards can cause injuries.
Awareness of the risks associated with wood-turning is essential to prevent accidents and ensure a safe working environment. Understanding the potential dangers allows woodturners to implement preventive measures to protect themselves from harm.
Necessary Precautions
Wearing appropriate protective gear is crucial when engaging in wood-turning activities. Gowoodturning the eyes from flying debris, while face shields provide additional protection for the face and neck. Dust masks help filter out harmful particles generated during turning.
Maintaining a clean workspace is equally vital for safety during wood-turning sessions. Clutwoodturningactions within the workspace can increase the likelihood of accidents occurring. Keeping the area tidy and organized reduces the risk of tripping over objects or inadvertently coming into contact with hazardous materials.
As I’ve gained experience in wood-turning, I’ve realized that wood-turning safety is non-negotiable. It’s essential to approach each session focusing on maintaining personal well-being through preventive practices such as wearing protective gear and keeping my workspace clutter-free.
Building Skills with Spindle and Bowl-Turning
Learning Spindle Turning
Spindle turning involves creating items like pens, candlesticks, and table legs. Understanding the angle at which the tools interact with the wood is essential. This technique requires precision and finesse to achieve smooth curves and straight lines. As a beginner, start by practicing on scrap wood before moving on to more intricate projects. Experimenting with different tools will help you understand how each affects the wood.
A deep understanding of spindle-turning techniques is crucial for mastering this art form. The left hand should guide the tool while the right-hand controls its movement. By focusing on grain orientation and adjusting your approach accordingly, you can create stunning pieces that showcase functionality and aesthetics.
Personal Note: I found it helpful to watch online tutorials when I was learning spindle turning. Seeing experienced woodturners in action provided valuable insights into proper tool handling and positioning.
Exploring Bowl-Turning Techniques
Bowl turning requires unique skills due to its specific considerations, such as grain orientation and hollowing techniques. Understanding how to work with various angles is vital for achieving different shapes within bowls. Hollowing out the interior demands patience, precision, and attention to detail.
As you learn to turn bowls, remember that practice makes perfect, and experimentation leads to mastery in this craft.
In my experience, starting with smaller bowls allowed me to refine my hollowing technique before moving on to larger pieces.
Creating a Productive Wood-turning Workspace
EfficWoodturning
When setting up your wood-turning workspace, a wood-turning organized layout is essential. Consider the flow of movement within the space and ensure that everything is easily accessible. A well-designed workspace will enhance your wood-turning experience by focusing on your craft without unnecessary distractions.
When designing your wood-turning workspace, it’s-woodturning consider factors such as lighting and ventilation. Adequate lighting is necessary for precision work, while good ventilation helps maintain air quality and keeps you comfortable during long hours of turning. Ensure that there are dedicated areas for sharpening tools, storing dry wood blanks, and assembling finished projects.
Storage Solutions
Practical storage solutions play a vital role in maintaining an organized wood-turning workspace. Wood-turning cabinets or wall-mounted organizers keep your tools and supplies neatly arranged and readily accessible. This saves time and reduces clutter, creating a more conducive creative environment.
Consider incorporating storage solutions that allow storing materials at the proper angles for easy access when working on different projects. Organizing your space this way can optimize efficiency and minimize disruptions during the wood-turning process.
Ergonomic woodturning, in addition to efficient design and storage solutions, prioritizes creating an ergonomic setup that promotes comfort while turning. Please pay attention to the height of your workbench or lathe to ensure it aligns with comfortable working heights. An ergonomic setup minimizes strain on your body during extended turning periods, allowing you to focus on effectively honing your skills.
Joining the Wood-turning Community for Woodturning with Fellow Woodturners
Engage with other wood-turning enthusiasts by joining clubs, participating in online forums, or joining social media groups. These platforms provide opportunities to share experiences, seek advice, and learn from others’ projects. For instance, attending club meetings can give valuable insights about different wood types and turning techniques.
Interacting with seasoned members allows you to gain practical tips and tricks that might not be readily available in instructional videos or books. These connections can potentially lead to collaborative projects or mentorship opportunities. By actively engaging with the community, you’ll build a network of support and expertise to aid your growth as a woodturner.
Workshops and Demonstrations
Attending workshops or demonstrations hosted by experienced turners is an excellent way to expand your knowledge base. These events often cover various topics such as tool selection, sharpening techniques, and finishing methods. By observing skilled artisans, you can learn new skills and gain insight into their creative process.
Personal Insight: Attending a segmented turning workshop expanded my understanding of working with different types of wood and introduced me to innovative design concepts that I hadn’t considered before.
Sharing Your Work
You are showcasing your creations within the wood-turning community to receive constructive feedback while inspiring others with your projects. Whether it’s through social media posts or participating in club exhibitions, sharing your work fosters a sense of camaraderie among fellow turners. Moreover, witnessing other members’ diverse styles and approaches can spark fresh ideas for future projects.
Conclusion
In conclusion, mastering wood-turning requires essential wood-turning, practical skills, and a solid commitment to safety. Understanding the basics, selecting the right tools and wood, and creating a conducive workspace are crucial for success. Prioritizing safety and continuous skill-building enhances the wood-turning experience and wood-turning to personal growth within the wood-turning community. As Iwoodturning’s guide, I encourage you to apply these fundamentals diligently, seek mentorship or community support, and never stop exploring new techniques to elevate your wood-turning craft.
FAQ
What are the essential tools needed to get started with wood-turning?
Wood-turning requires chisels, gouges, parting tools, calipers, and a sharpening system. These tools are crucial for shaping and finishing your turned wood projects effectively.
How do I ensure safety when practicing wood-turning?
Prioritize safe wood turning with appropriate protective gear such as goggles and a face shield. Always secure your workpiece properly on the lathe and maintain a safe distance from rotating components. Familiarize yourself with emergency procedures in case of accidents.
What types of wood are suitable for beginners in wood-turning?
For beginners, wood-turning starts with softer woods like pine or poplar, which are easier to shape. As you gain experience, you can progress to harder woods like maple or cherry. Ensure the wood is free from defects and well-seasoned for optimal results.
How can I improve my skills in spindle and bowl turning?
Practice creating shapes such as beads and coves to enhance your spindle-turning skills. For bowl turning, focus on mastering techniques like roughing out the blank, creating uniform wall thicknesses, and refining the final shape using different cutting tools.
Why is it essential to join the wood-turning community?
Joinwoodturningnity allows you to learn from experienced turners through workshops or online forums. You can also share your experiences while gaining inspiration from others’ work. Networking within the community provides valuable insights that can help advance your skills.