Table of Contents
A Woodturning Texturing Tool adds intricate designs and patterns to wooden surfaces. It enhances the aesthetic appeal of woodturning projects.
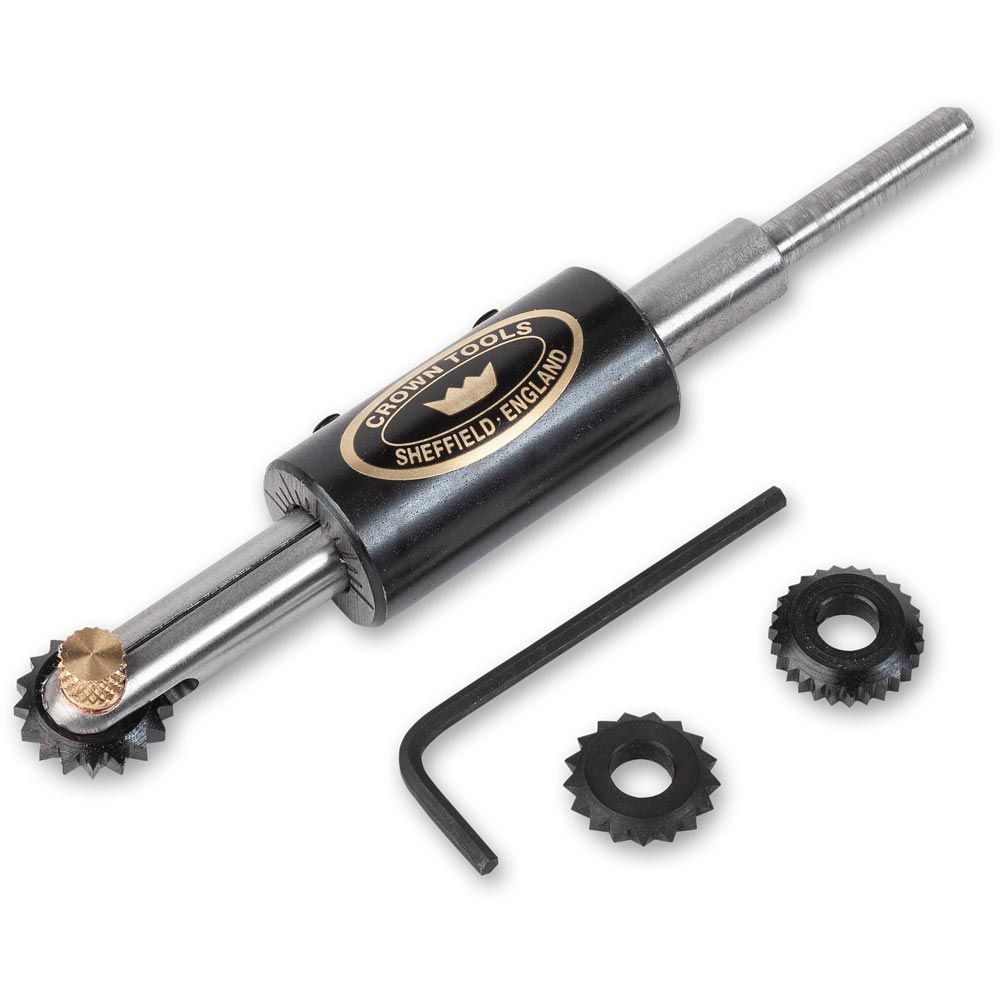
Woodturning texturing tools are essential for woodworkers aiming to create unique and detailed finishes. These tools come in various shapes and sizes, designed to produce specific textures. Whether you want a simple line pattern or an elaborate design, a texturing tool can achieve it with ease.
Many woodturners find these tools indispensable for adding a professional touch to their work. Using a texturing tool is straightforward, making it accessible for both beginners and seasoned woodworkers. Investing in a quality texturing tool can significantly elevate the quality of your woodturning projects.
Introduction To Woodturning Textures
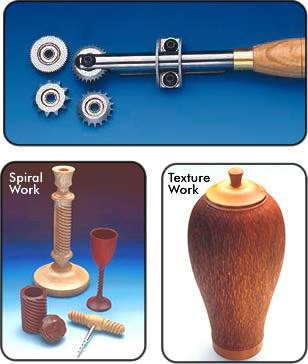
Adding texture to woodturning projects can make them unique. A textured finish gives a special look and feel. This technique enhances the beauty of wooden items. Different tools can create various patterns. You can use a texturing tool to achieve this. With practice, you can master this art. It can be a fun way to personalize your work.
Textured finishes make wood pieces stand out. They add depth and interest. These finishes can hide minor flaws. Texturing can improve grip on handles. It also increases the value of your work. People love unique and artistic items. Textured finishes can give an old piece new life.

Credit: www.packardwoodworks.com
Essential Tools For Texturing
There are different tools for woodturning. Texturing tools help create unique designs. Handheld tools are easy to use. Power tools offer more control. Burnishing tools add shine. Each tool has a special use. Choosing the right one is important.
Think about the project size. Small projects need small tools. Large projects need strong tools. Tool material matters too. Metal tools last longer. Wood tools are lighter. Choose based on your needs.
Mastering Texturing Techniques
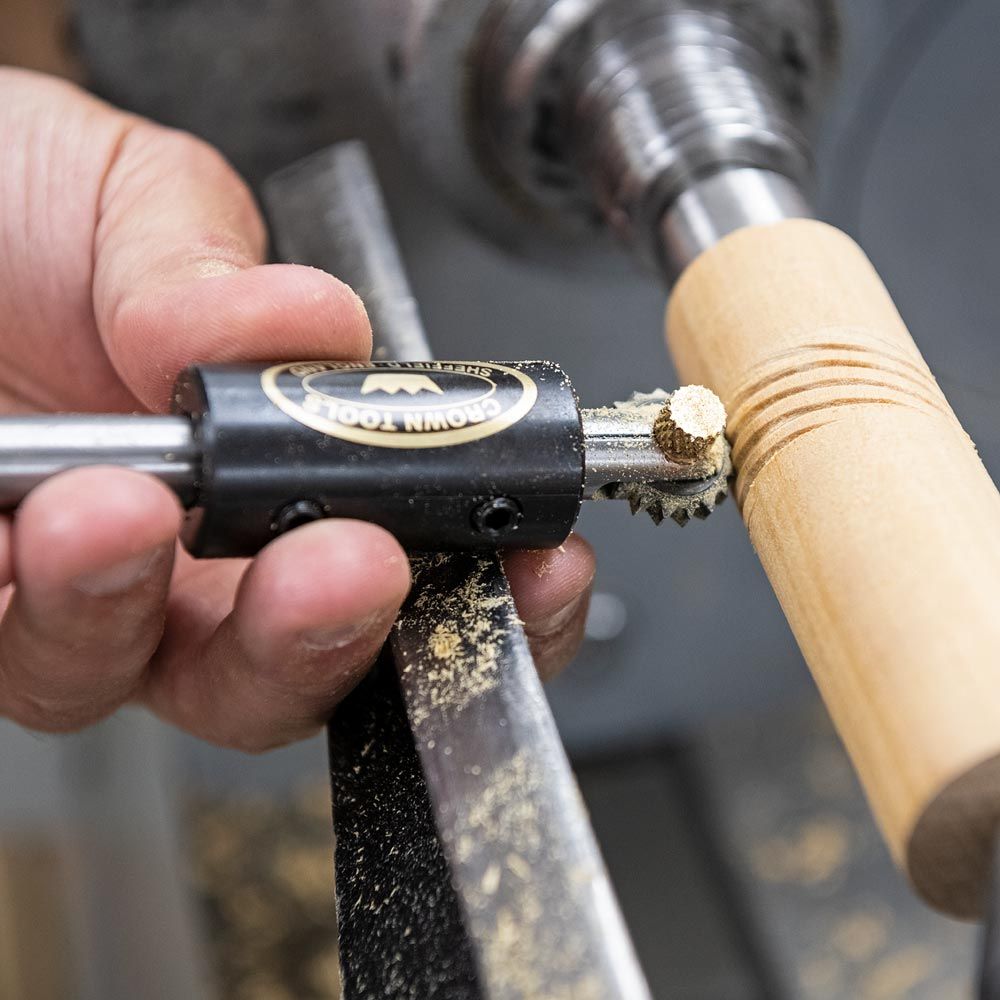
Using a texturing tool can create amazing patterns. Start with simple grooves and lines. Hold the tool steady. Move it slowly across the wood. Practice on scrap wood first. Experiment with different angles and pressures. You will see unique patterns emerge. Always wear safety goggles. Keep your hands steady and focused.
Create intricate patterns by combining simple techniques. Try overlapping grooves for a woven look. Use circular motions for swirls. Vary the depth of each cut. This adds dimension to your work. Pay attention to symmetry. Align your designs carefully. Plan your patterns ahead. This helps avoid mistakes. Practice makes perfect. The more you practice, the better your designs will be.
Texturing Tool Maintenance
Proper maintenance of woodturning texturing tools ensures longevity and optimal performance. Regularly clean and lubricate the tool to prevent rust and wear.
Cleaning And Care
Always keep your texturing tool clean. Use a soft brush to remove wood dust. Wipe the tool with a dry cloth after use. Avoid using water as it may cause rust. Store the tool in a dry place. Apply a light coat of oil to prevent rust. Regular care extends the tool’s life.
Sharpening Texturing Tools
Sharpening is key for effective texturing. Use a fine-grit sharpening stone. Hold the tool at the correct angle. Move it back and forth gently. Check for a sharp edge. Repeat until the tool is sharp. Use a honing guide for better results. Sharp tools give better texture.
Design Principles For Texturing
Woodturning texturing tools enhance the depth and detail of wooden creations. These tools allow for intricate patterns, making each piece unique and visually appealing. Perfect for both beginners and skilled artisans, they transform ordinary wood into captivating art.
Balancing Texture And Form
It’s important to balance texture and form in woodturning. Too much texture can overwhelm the piece. Too little texture can make it look plain. Try to find the right balance. Use different textures for different parts. This will make your piece look interesting and unique.
Choosing Textures For Visual Impact
Choose textures that add visual impact. Some textures can make the wood look more natural. Other textures can make it look more modern. Think about the overall design. Use textures to highlight certain areas. This will make your woodturning piece stand out.

Credit: www.axminstertools.com
Incorporating Textures Into Projects
Texturing bowls and platters adds a unique touch. Use a texturing tool to create patterns. Try spirals, lines, or dots. These patterns make the piece stand out. Smooth surfaces can look plain. Textures make them interesting. Start with a simple design. Experiment with different tools. Each tool gives a different result. Practice on scrap wood first. This helps avoid mistakes. Be patient. Texturing takes time.
Adding texture to spindles and handles improves grip. Textured handles feel better in hand. Use a texturing tool for this. Create grooves or patterns. Grooves provide extra grip. Patterns can be decorative. Sand the handle before texturing. This ensures smooth results. Apply light pressure with the tool. Too much pressure can damage the wood. Experiment with different designs. Find what works best for you. Test on scrap wood first.
Finishing Techniques For Textured Wood
Choosing the right finish is very important. Oil finishes bring out the natural beauty. Water-based finishes dry quickly and are safe. Lacquer gives a hard, shiny surface. Wax can add a soft sheen. Polyurethane is very durable and protects well.
Apply finish in thin layers. This helps the texture stand out. Use a soft brush for even coverage. Wipe off extra finish with a clean cloth. Let each layer dry fully. Sand lightly between layers with fine sandpaper. This keeps the texture smooth. Always work in a well-ventilated area.

Credit: www.axminstertools.com
Creative Projects And Ideas
Explore creative projects with a woodturning texturing tool, perfect for adding unique patterns to wooden pieces. Enhance your woodworking skills by experimenting with various textures and designs.
Inspirational Project Examples
Texturing tools can create amazing patterns. Bowls, vases, and pens look unique with textures. Try making a textured bowl for a fun project. Add texture to a pen for a special gift. Vases with patterns add charm to any room. Experiment with different tools for unique effects. Use different woods for various textures. Watch tutorials for new ideas and techniques. Sharing your work can inspire others.
Tips For Developing Your Own Style
Practice regularly to improve your skills. Study the work of other woodturners. Combine different techniques for unique results. Experiment with various textures. Keep a journal of your projects. Take notes on what works best. Use different wood types. Try new tools and methods. Ask for feedback from other woodturners. Always stay curious and creative.
Troubleshooting Common Texturing Issues
Proper tool alignment is key. Make sure the tool is aligned with the wood. Uneven pressure causes bad textures. Apply consistent pressure. Speed control is important. Use the right speed for your project. Too fast or slow ruins the texture. Keep the tool sharp. A dull tool leads to poor results. Always check the wood quality. Bad wood affects the texture.
Found a mistake? Don’t panic. Sand the area gently. This removes the error. Reapply the texture. Use light strokes. Check for evenness. Fix any uneven spots. Use a finer tool for details. This hides small mistakes. Always inspect your work. Fix problems as they appear.
Learning From The Masters
Watching expert woodturners helps you learn faster. They show the right techniques. They also teach you to avoid mistakes. Experts often share their tips and tricks. These tips can improve your skills quickly. Practicing what you see is important. It helps you remember better. Videos and live demos are very helpful. They give you a clear view of the process. You can pause and replay videos. This helps you understand each step.
Workshops are a great place to learn. They offer hands-on experience. You can ask questions directly. Workshops often have skilled instructors. They provide immediate feedback. This helps you correct mistakes on the spot. Books and online resources are also useful. They offer detailed guides and tutorials. Many websites have free video lessons. These resources are available anytime. You can learn at your own pace. Joining woodturning clubs can also help. Members often share valuable advice.
Frequently Asked Questions
How Do You Texture Wood Turnings?
To texture wood turnings, use tools like wire brushes, texturing wheels, or chisels. Apply varying pressure for desired effects. Finish with sandpaper.
How Do You Use The Robert Sorby Texturing Tool?
Hold the Robert Sorby texturing tool firmly. Position it on the wood surface at a desired angle. Apply gentle pressure and move steadily to create textured patterns. Adjust the angle and pressure for varied effects. Practice on scrap wood for best results.
How Do You Use The Wagner Texturing Tool?
To use the Wagner texturing tool, first fill it with texture material. Adjust the spray nozzle for desired pattern. Apply evenly on the surface using smooth, consistent strokes. Clean the tool thoroughly after use.
What Is A Texturing Tool?
A texturing tool creates surface patterns or designs on materials like clay, metal, or fabric, enhancing visual appeal.
Conclusion
Mastering the woodturning texturing tool elevates your woodworking projects. It adds unique and intricate designs effortlessly. Experiment with different techniques for stunning results. Your craftsmanship will impress and inspire. Embrace the creativity and precision this tool offers. Happy woodturning!
