Table of Contents
Vase turning involves shaping and decorating vases using various techniques. It creates unique, artistic, and functional pieces.
Vase turning is an ancient craft that combines artistry and skill. Artisans use pottery wheels or lathes to shape clay, wood, or other materials into beautiful vases. This process allows for endless creativity, resulting in one-of-a-kind designs. Vase turning can enhance home decor and serve as functional art.
The tactile nature of the craft also provides a therapeutic experience for the maker. Whether you are a beginner or an experienced artisan, vase turning offers a fulfilling way to express creativity. Embrace this timeless craft to create stunning, personalized vases that reflect individual style and artistry.

Credit: www.reddit.com
The Essence Of Vase Turning
Vase turning started many years ago. It began in ancient civilizations. People used simple tools to shape clay. They made beautiful vases and pots. This art spread across the world. Different cultures added their styles. Vase turning became a beloved craft.
Vase turning is different from other ceramic processes. It involves shaping clay on a spinning wheel. Other methods may use molds or hand-building. Vase turning allows for smoother finishes. It also offers more control over the shape. This technique creates unique and elegant pieces.
Essential Tools For Vase Turning
The potter’s wheel is the heart of vase turning. Choose a wheel with a smooth spinning surface. Electric wheels offer consistent speed control. Kick wheels provide a traditional feel. Make sure the wheel is sturdy and balanced. A well-balanced wheel prevents wobbles. This helps in creating even and symmetrical vases. Consider the wheel’s size and weight. Smaller wheels are portable but may limit vase size. Larger wheels can handle bigger projects.
Turning tools are crucial for shaping and refining vases. Ribs help to smooth and shape the clay. They come in different materials like wood, metal, and rubber. Trimming tools are used to remove excess clay. These tools help to define the base and create fine details. Loop tools are good for hollowing out and shaping the vase. Keep your tools clean and sharp. This ensures precise and clean cuts. Proper tools make vase turning easier and more enjoyable.
Preparing Your Clay
Ensure the clay is kneaded thoroughly to remove air bubbles. Center the clay on the wheel for a smooth vase-turning process. Proper preparation aids in achieving a flawless finish.
Wedging Techniques For Air-free Clay
Good wedging makes clay smooth and air-free. Start by cutting the clay block in half. Stack the pieces and press them together. Repeat this process until the clay is soft and even. Roll the clay into a log shape. Use your hands to push and pull the clay. This helps to remove air bubbles. Proper wedging is key for strong, even pottery.
Achieving The Ideal Consistency
Clay should feel like soft dough. It should not be too wet or too dry. If the clay is too wet, let it air dry for a bit. If it is too dry, sprinkle some water on it. Knead the clay until it feels right. Ideal consistency makes turning easier and the vase will be smooth and strong.
Centering And Opening The Clay
Begin by placing your clay on the wheel. Make sure it sticks well. Push the clay down with your hands. This helps to center it. Use both hands to shape it into a cone. Press down the top of the cone gently. This will make the clay even more centered. Keep your hands steady.
Push your thumb into the center of the clay. Make a small hole. Use your fingers to widen the hole. Keep the base thick for strength. Smooth the inside with your fingers. This removes air bubbles. The clay should feel even and smooth. This is the foundation for your vase.
Shaping The Vase
Begin by choosing the right clay. Soft clay is easier to mold. Shape the clay into a ball. Place the ball on the wheel. Spin the wheel slowly. Use your hands to press the clay down. Form a flat base. Keep the base even. Make sure it is round. Use a sponge to smooth the surface. Keep the clay wet. This helps to avoid cracks.
With the base ready, start pulling the clay upwards. Use your fingers to pinch and lift the clay. Spin the wheel faster. Shape the clay into a cylinder. Keep the walls even. Use a rib tool to smooth the sides. Wet the clay regularly. This keeps it workable. Make sure the walls are thick enough. Avoid making them too thin. This can cause breakage.
Advanced Turning Techniques
Collaring creates a narrower neck for your vase. Start by shaping your clay into a cylinder. Use your thumbs to pinch the top of the cylinder gently. Slowly squeeze the clay inward to form the neck. Keep the clay moist to prevent cracks. Adjust your pressure to maintain control. Your vase will have a delicate, elegant neck.
Ribs help create a smooth surface on your vase. Use a wooden or metal rib tool for this task. Hold the rib against the spinning clay. Apply gentle pressure to smooth out bumps. Keep the rib tool steady and firm. Move it slowly from bottom to top. Your vase will look polished and professional.
Trimming And Finishing Touches
Trimming the base of a vase is essential. It helps the vase stand evenly. Use a sharp tool to trim. Trim slowly to avoid mistakes. Careful trimming makes the vase look beautiful. Each vase needs unique trimming. Practice makes you better at trimming bases. Always check your work as you trim.
Smooth finishing makes your vase look professional. Sand the surface gently. Use fine-grit sandpaper for the best results. Smooth surfaces feel nice to touch. Inspect the vase for any rough spots. Fix them before the vase dries. A smooth vase is easier to paint or glaze. Your vase will be admired by many.
Drying And Firing Considerations
Proper drying is crucial to prevent cracks. Vases must dry evenly. Uneven drying causes stress. Stress leads to cracks. Place vases in a controlled environment. This ensures even drying. Avoid direct sunlight. Sunlight dries vases too quickly. Quick drying causes cracks. Use plastic covers to slow drying. This helps prevent cracks. Rotate vases daily. This ensures even exposure to air.
Understanding kiln cycles is important. Kilns have different phases. Each phase impacts the vase. The first phase is the drying phase. This removes moisture. The second phase is the firing phase. This hardens the vase. The final phase is the cooling phase. Cooling must be slow. Rapid cooling causes cracks. Monitor kiln temperatures closely. Follow the kiln’s instructions carefully. Proper firing ensures a strong vase.
Glazing Your Vase
Pick glazes that look beautiful. Some glazes are shiny; others are matte. Colors can be bright or soft. Think about how the vase will look in your home. Experiment with different glazes to find the best one. Mix colors for a unique effect. Test the glaze on a small piece first.
Apply thin coats of glaze. Use a brush for smooth strokes. Dip the vase in glaze for even coverage. Spin the vase while applying to avoid drips. Let each layer dry before adding another. Sand lightly between coats for a smooth finish. Avoid thick layers to prevent cracks.
Troubleshooting Common Vase Turning Issues
Wobbly pots can be tricky to fix. Use a level surface to ensure stability. Check the center of the wheel. Make sure the clay is evenly distributed. Adjust the speed of the wheel if needed. Sometimes, the speed can make a big difference. Recenter the clay if it looks off-balance. Wet your hands and the clay to improve control. Slow, even pressure helps keep the pot steady.
Cracks can ruin a vase. Inspect the vase for small cracks. Use slip to fill in minor cracks. Smooth out the area with a wet sponge. For bigger cracks, use a clay coil. Blend it into the vase to hide the crack. Imperfections can be sanded down. Gently rub the surface with fine sandpaper. Be careful not to sand too much. Glazing can also hide small flaws.
Exploring Styles And Designs
Patterns and textures make vases unique. Stripes, dots, and swirls can be added. Clay, glass, and metal all have different textures. Mixing smooth and rough surfaces adds interest. Bright colors can make patterns stand out. Soft colors give a calm feeling.
Vases come in many shapes. Tall and thin vases are elegant. Short and round vases feel cozy. Square vases are modern. Adding curves makes vases more artistic. Mixing shapes in one display looks interesting. Shapes can change how flowers look.

Credit: m.youtube.com
Preserving And Showcasing Your Work
Store vases in a cool, dry place. Avoid direct sunlight to prevent fading. Use soft cloths to wrap them. This protects from dust and scratches. Keep vases separated to avoid damage. Use boxes with padding for extra safety.
Choose a well-lit area for display. Natural light can make vases shine. Place on a sturdy shelf to avoid falls. Arrange vases in groups for a stylish look. Match vase colors with room decor. This creates a harmonious atmosphere.

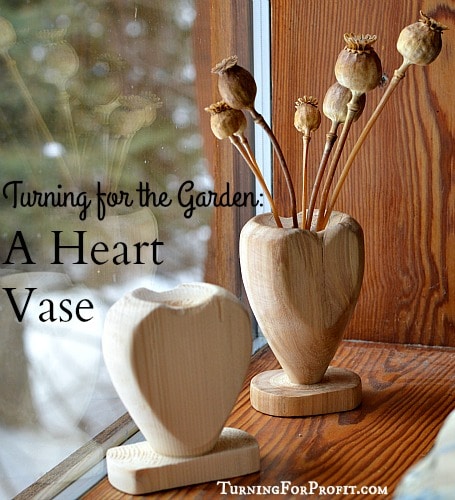
Credit: www.turningforprofit.com
Frequently Asked Questions
What Is Vase Turning?
Vase turning is the process of shaping a vase using a lathe. This craft involves skilled manipulation to create unique, decorative designs.
How To Start Vase Turning?
To start vase turning, you need a lathe, appropriate tools, and wood or clay. Begin with basic shapes and practice your technique.
What Materials Are Used For Vase Turning?
Common materials for vase turning include wood, clay, and sometimes metal. Each material requires specific tools and techniques.
What Are The Benefits Of Vase Turning?
Vase turning offers creative satisfaction and stress relief. It also allows for the creation of personalized, unique home decor items.
Conclusion
Vase turning is an engaging and rewarding craft. It allows creativity to flourish through unique designs. Whether you’re a beginner or experienced, the joy of creating beautiful vases is unmatched. Embrace this art form and let your imagination guide your hands.
Happy vase turning!
