
Table of Contents
Turning pens is a rewarding and creative hobby. It involves crafting beautiful, functional writing instruments from various materials.
Pen turning has gained popularity among craft enthusiasts. This hobby allows individuals to create unique, personalized writing instruments. Using wood, acrylic, or even metal, each pen becomes a piece of art. The process involves shaping, sanding, and polishing materials on a lathe.
Beginners can start with basic kits, while experienced turners experiment with custom designs. Crafting pens not only provides a sense of accomplishment but also makes for cherished gifts. Whether for personal use or as a thoughtful present, turning pens combines creativity with practicality. Dive into this fulfilling craft and enjoy the satisfaction of making something truly unique.
The Allure Of Handcrafted Pens
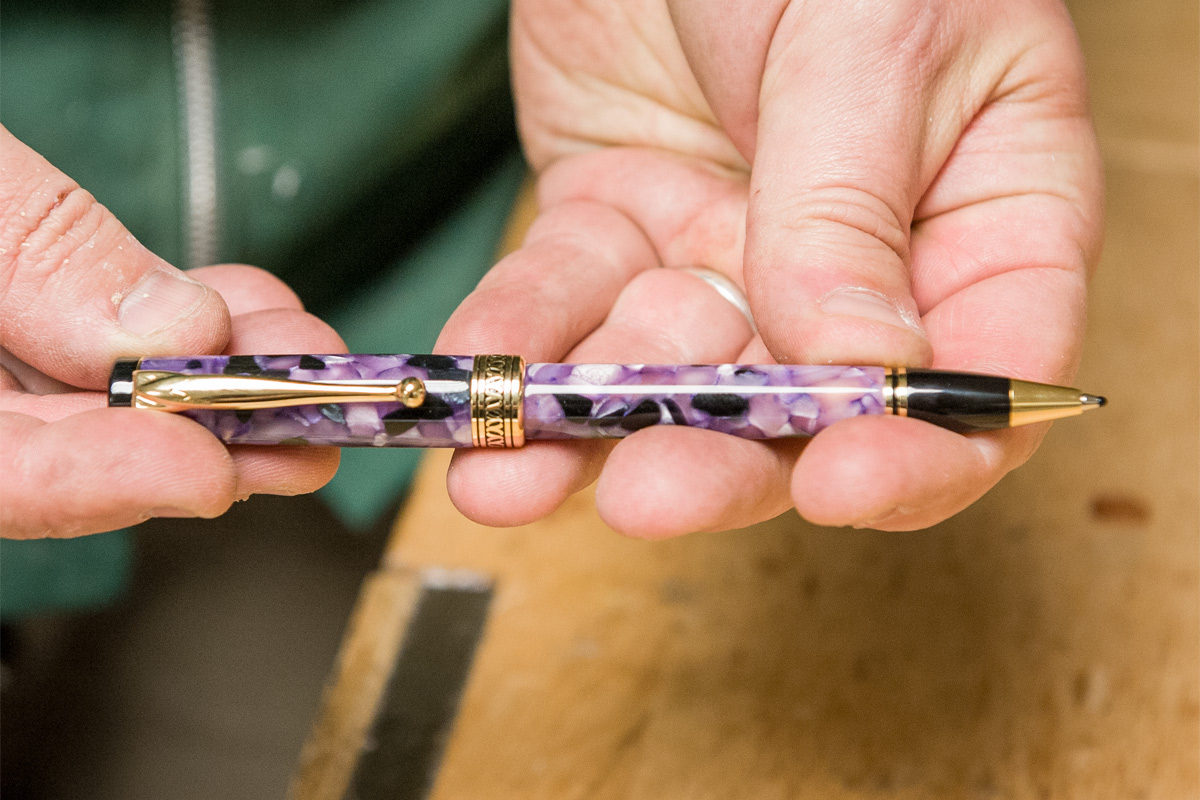
Handcrafted pens offer a unique feel. Each pen is made with care. Personal touches make each pen special. They can be great gifts. People love items that feel unique.
Crafting pens by hand keeps old skills alive. Digital tools are fast, but hands-on work is precious. Handcrafted pens show dedication and care. They remind us of simpler times. Many still value this kind of craftsmanship.
Materials Matter: Choosing The Right Components
Selecting the right materials is crucial for crafting quality pens. Each component affects durability, aesthetics, and functionality. The choice of wood, acrylic, or metal can transform the final product.
Wood Vs. Acrylic Blanks
Wood blanks have a natural look. They come in many types like oak and maple. Each type has its own unique grain patterns. Acrylic blanks are bright and colorful. They are easier to shape and polish. Some people like the shine and smoothness of acrylic. Others prefer the warm feel of wood. Both materials can make beautiful pens.
Selecting Pen Hardware
Good pen hardware is important. It includes parts like the clip and tip. Brass and chrome are popular choices. They are durable and shiny. Some hardware has gold plating. This can add a luxurious touch. Always choose high-quality hardware. It makes the pen last longer.
Tools Of The Trade: Essential Equipment
Crafting exquisite pens requires essential tools such as a lathe, chisels, and sandpaper. Precision and creativity come together with these indispensable items.
Lathe Selection And Setup
A lathe is the main tool for turning pens. Choose a lathe that fits your workspace. Mini lathes are perfect for beginners. They are small and easy to use. Make sure your lathe is stable. A sturdy table will help. Secure your lathe to the table. This prevents it from moving during use. Proper setup is key for safety. Follow the user manual for best results.
Chisels, Drills, And Sanders
Chisels are used to shape the pen. Sharp chisels make smoother cuts. Drills help in creating holes for the pen parts. Choose the right size drill bit. Sanders make the pen surface smooth. Sandpaper with different grits is needed. Start with coarse grit. Finish with fine grit for a smooth surface. Proper tools make pen turning easier and fun.
Credit: www.axminstertools.com
The Design Process: Sketching Your Vision
Start by imagining your pen’s look. Think about its shape and color. Draw your ideas on paper. Make sure it is easy to hold. Pay attention to the pen’s grip. A good grip helps in writing. Balance beauty and usability. A pretty pen should also work well. Choose materials that are both strong and nice to look at. Keep refining your sketches until you are happy.
Use a mix of old and new methods. Try different tools for unique effects. Experiment with various textures and finishes. Be bold with colors and shapes. Add intricate details to make the pen special. Technology can help with precision. Use 3D modeling to see your design in detail. Combine traditional craftsmanship with modern tools. This creates a pen that is both beautiful and functional.
Shaping The Blank: A Step-by-step Guide
Start by choosing a high-quality pen blank. Cut the blank to the right size for your pen kit. Drill a hole through the center. Make sure the hole is straight. Use a vise to hold the blank steady. Insert the brass tube into the hole. Use glue to secure the tube. Allow the glue to dry completely. Trim the ends of the blank. Make the ends flush with the brass tube. Your pen blank is now ready for turning.
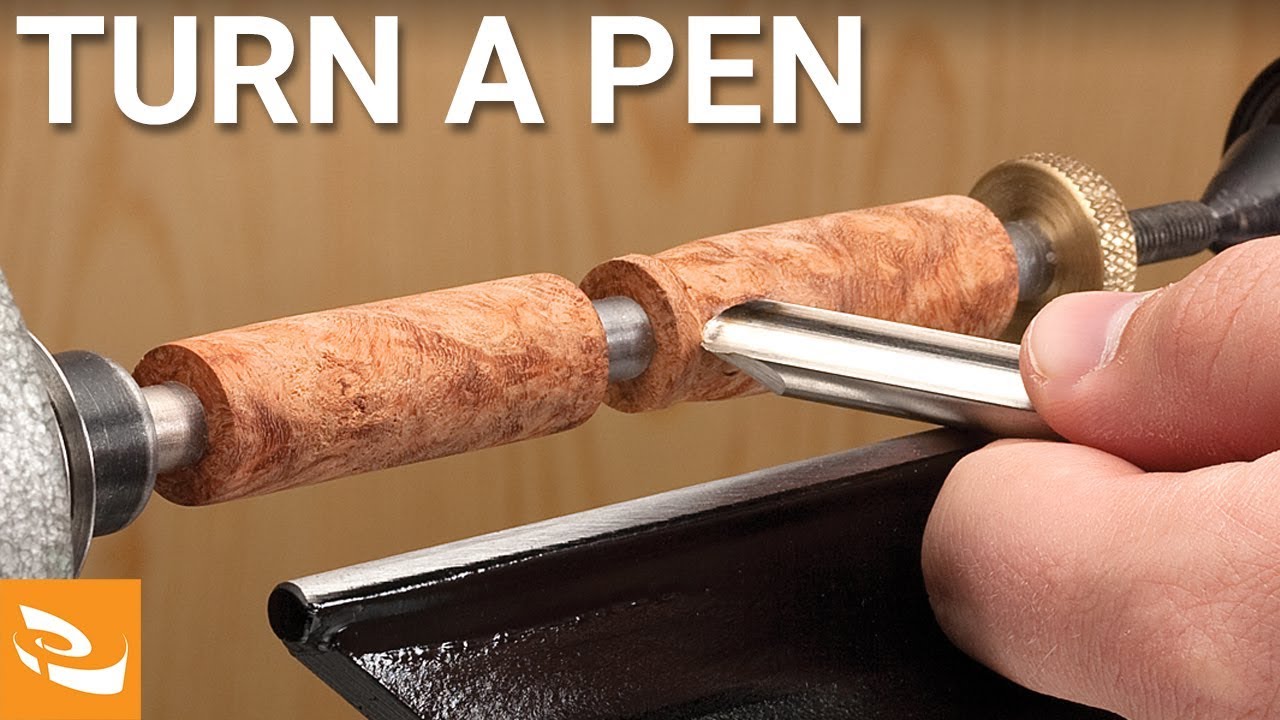
Mount the pen blank on the lathe. Ensure it is secure. Use a roughing gouge to shape the blank. Remove the corners first. Shape it to a cylinder. Switch to a spindle gouge for finer shaping. Create the desired pen profile. Use light cuts for a smooth finish. Sand the blank with fine-grit sandpaper. Start with coarse grit. Move to finer grits for a smooth surface. Apply a finish to protect the wood. Buff the finish to a shine. Your pen blank is now fully turned.

Credit: sw-sw.org
Finishing Touches: Sanding And Sealing
Sanding is important for a smooth pen. Start with coarse sandpaper. Move to finer grit for a smooth finish. This removes rough spots and edges. Make sure to sand evenly. Do not rush this step. A smooth surface feels nice in hand. It also helps in sealing.
A good sealant protects your pen. Polyurethane is a popular choice. It creates a strong, clear coat. Shellac is another option. It dries quickly and adds shine. For a natural look, use beeswax. It is eco-friendly and easy to apply. Always read instructions on the sealant can. Apply in thin layers for best results.
Assembly And Detailing: Bringing The Pen Together
Press the hardware parts carefully. Use a vice or press tool for this. Make sure each part fits well. Start with the nib. Then, attach the pen body. Finally, secure the clip and cap. Test each component for a tight fit.
Add fine details to your pen. Use sandpaper to smooth the surface. Apply a finish for a shiny look. Customize with names or designs. Use a wood burner for engraving. Personal touches make the pen unique. Always handle tools with care.
Credit: www.youtube.com
Presenting Your Pen: Packaging And Display
Use unique packaging to make your pen stand out. A wooden box adds a touch of class. Recycled materials can give an eco-friendly feel. A custom pouch is a simple yet elegant choice. Magnetic closures offer a modern twist. Clear cases let the pen shine through.
Display stands help showcase your pen. Rotating displays catch the eye. Use LED lighting to highlight details. Glass cases add a layer of protection. Tiered stands offer a multi-level view. Interactive displays let customers feel the pen. Wall-mounted racks save space and look stylish.
Frequently Asked Questions
What Does It Mean To Turn Pens?
Turning pens means crafting pens on a lathe. Artisans shape and polish wood or acrylic blanks into beautiful, functional pens.
What Is Needed To Turn Pens?
To turn pens, you need a lathe, pen blanks, turning tools, sandpaper, finishes, and pen kits. Safety gear is essential.
What Are The Different Types Of Pens For Turning?
The different types of pens for turning include rollerball, ballpoint, fountain, and gel pens. Each offers unique writing experiences.
What Speed To Turn Pens?
For turning pens, use a lathe speed of 3,000 to 4,000 RPM. Higher speeds ensure smoother finishes. Adjust speed based on wood type and tool sharpness. Always prioritize safety.
Conclusion
Crafting your own pens is a rewarding and creative hobby. It allows for personal expression and unique gifts. Embrace the art of pen turning to enhance your skills and create beautiful, functional pieces. Discover the joy of turning pens and watch your craftsmanship flourish.
Start your pen turning journey today!