
Table of Contents
Turning burls involves shaping irregular wood growths into unique, decorative pieces. This craft requires skill, patience, and the right tools.
Burls are irregular growths found on trees, often prized for their unique grain patterns and beauty. Woodturners and artisans transform these growths into stunning art pieces, bowls, and furniture. The process starts with selecting the right burl, ensuring it’s properly cured and free of major defects.
Tools like lathes and chisels help shape the burl into the desired form. Safety is crucial, as working with burls can be unpredictable due to their irregular structure. Each burl piece is unique, making the resulting creations one-of-a-kind and highly valued in woodworking circles.
Credit: www.ocagnc.org
The Allure Of Wood Burls
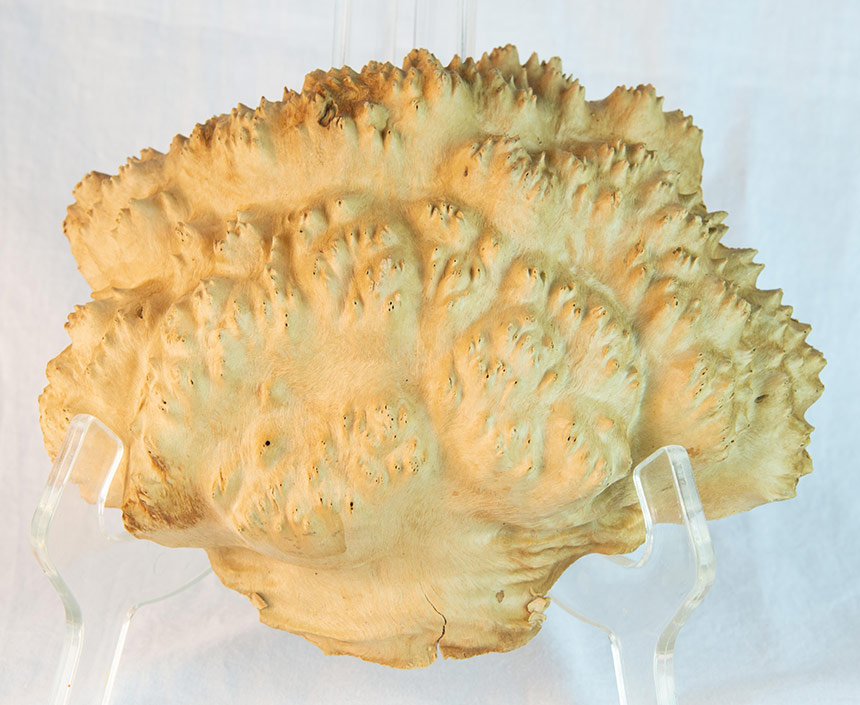
Burls are special growths on trees. They form in response to stress. This stress can be from injury, virus, or fungus. Each burl has a unique pattern. No two burls look alike. They have swirling grain patterns. These patterns make them special. Burls are dense and heavy. They are also hard to work with. But the beauty is worth it.
Woodcrafters love burls. The unique patterns are stunning. Burls can be turned into bowls and vases. They make beautiful furniture pieces. The wood is tough but rewarding. The finished products are one-of-a-kind. Burls add value to any project. They are a prized find in the world of woodworking.
Sourcing Quality Burls
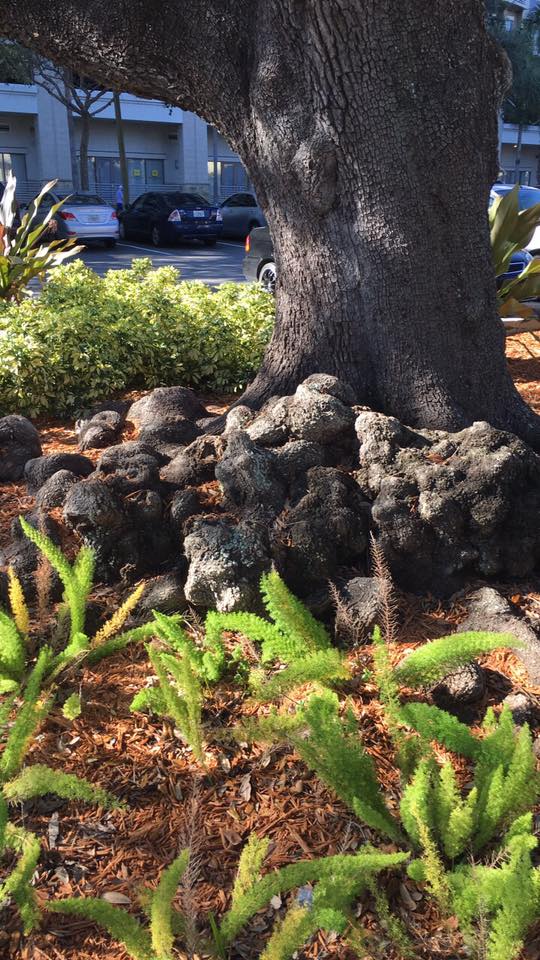
Burls are rare and unique. They grow on certain trees. Maple, oak, and walnut are common species with valuable burls. Each tree species has a different burl pattern. Maple burls often have swirling patterns. Walnut burls are darker and denser. Oak burls have a rough texture. These unique patterns make burls special. They are sought after by woodworkers.
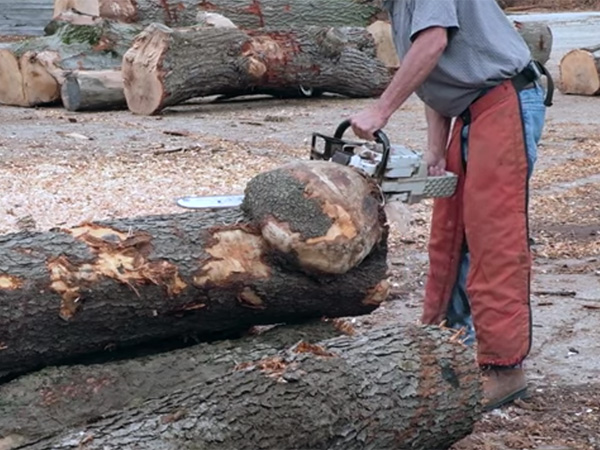
Harvesting burls must be done with care. Cutting a burl can harm the tree. It may even kill it. Ethical harvesting means not damaging the tree. Use special tools to remove the burl. Leave the tree healthy. Replace harvested trees by planting new ones. This keeps forests sustainable. Respect nature while sourcing burls.
Preparation And Preservation
Burls need proper cleaning to remove dirt and debris. Use a soft brush and water for this task. Make sure the burl is completely dry before the next step. Drying can be done naturally or with a kiln. Natural drying takes more time but keeps the burl intact. Kiln drying is faster but needs careful monitoring.
Preventing cracks is crucial for preserving burls. Seal the ends with wax or paint to lock in moisture. Store burls in a cool, dry place to avoid decay. Regular checks for signs of cracking or decay help in early detection. Use fungicides if necessary to keep the wood healthy.
Designing With Burls
Burls have unique patterns. Each burl is different and special. Use your imagination. Think about the shape and size. Plan your design carefully. Sketch your ideas on paper. Make sure to highlight the natural beauty of the burl. This adds a personal touch to your project. Visualizing helps in achieving the desired look.
Natural flaws in burls add character and charm. Use these flaws in your design. They can become focal points. Cracks can be filled with resin. This creates a stunning effect. Holes can be left as they are. They add to the rustic appeal. Work with the burl, not against it. Embrace its imperfections. This makes your piece unique and beautiful.
Cutting Techniques For Burls
Mastering cutting techniques for burls enhances the beauty of turned wood pieces. Properly preparing and slicing burls reveals unique grain patterns.
Tools For Precise Cuts
For precise cuts, use a bandsaw. Bandsaws are ideal for cutting burls. They handle the complex grain patterns well. A sharp blade is essential. Change the blade often. Hand saws can also be used. They are good for small, detailed work. Chisels help in refining the cuts. Always keep them sharp. Safety gear is a must. Wear goggles and gloves. Protect your hands and eyes.
Burls have complex grain patterns. They can be tricky to cut. Always go slow with the saw. Watch the grain carefully. Avoid forcing the blade. Let the saw do the work. This prevents tear-out. Use a fine-toothed blade. It gives a smoother cut. Keep your tools sharp. Dull tools can cause accidents. They also damage the wood.
Credit: www.woodworkersjournal.com
Shaping And Carving
Hand carving gives a personal touch to your burl. Each stroke is unique. Power tools, on the other hand, are fast and efficient. They save time and effort. Both methods have their own benefits and drawbacks. Hand tools are better for fine details. Power tools are great for large areas.
Use sandpaper to smooth surfaces. Start with coarse grit. Move to finer grits for a smooth finish. Rasps and files help shape curves. Wet sanding can also be used for a polished look. Always sand in a circular motion. This prevents scratches and uneven surfaces.
Sanding And Finishing
Start with a low grit sandpaper. This helps remove rough spots. Choose 80-grit for heavy sanding. Move to 120-grit for smoother surfaces. Finish with 220-grit for fine sanding. Always sand with the grain. This prevents scratches. Change sandpaper often. Dull sandpaper can damage wood.
Clean the wood before applying any finish. Use a tack cloth to remove dust. Apply a thin coat of finish. Let it dry completely. Sand lightly with 220-grit sandpaper between coats. This helps the next coat stick better. Repeat the process for a smooth finish. Choose a clear finish to show the wood grain.
Credit: schoolofwoodwork.com
From Burls To Art
Burls, with their unique grain patterns, transform into stunning pieces of art through skilled craftsmanship. Artisans reveal hidden beauty in these natural wood formations, creating one-of-a-kind masterpieces.
Showcasing Completed Works
Burl artists create amazing pieces from burls. Each burl is unique. Artists transform these into bowls, tables, and sculptures. Their work showcases the natural beauty of wood. Burls have interesting patterns and shapes. Finished pieces look like beautiful art. People admire and buy these creations. The process is both art and craft. Artists use special tools and techniques. Their skills bring out the best in each burl.
The Market For Burl Art Pieces
The market for burl art is growing. Collectors love the uniqueness. Each piece is one-of-a-kind. Burl art can be expensive. Buyers appreciate the craftsmanship. Artists gain recognition for their work. Burl art pieces are often featured in galleries. They also appear in high-end homes. People love the natural look. Burl art fits well with many styles. It adds a touch of nature to any space.
Frequently Asked Questions
How Do You Prepare A Burl For Turning?
To prepare a burl for turning, first remove any dirt and loose bark. Cut the burl into manageable pieces. Seal the ends with wax to prevent cracking. Mount the burl securely on the lathe. Start turning at a slow speed to shape and balance the piece.
How Much Is A Burl Worth?
Burl prices vary widely, typically ranging from $2 to $20 per pound. Factors include size, type, and quality.
Why Are Burls So Valuable?
Burls are valuable for their unique, intricate grain patterns. They are rare and highly sought after by woodworkers. Their beauty and uniqueness make them perfect for high-end furniture and art.
Why Do Woodworkers Like Burls?
Woodworkers cherish burls for their unique, intricate grain patterns. Burls add beauty and value to woodworking projects. They offer a distinct, natural look that enhances craftsmanship.
Conclusion
Embracing the art of turning burls can elevate your woodworking projects. These unique pieces add character and beauty. Experiment with different techniques to achieve stunning results. With patience and creativity, you’ll master this craft. Start turning burls today and bring a new dimension to your work.
Enjoy the journey and happy crafting!