
Table of Contents
A pen turning lathe is a specialized tool used for crafting custom pens. It allows precise shaping and finishing of pen blanks.
Pen turning lathes cater to both hobbyists and professional woodworkers. These tools enable the creation of unique, high-quality pens. Users can work with various materials, such as wood, acrylic, and metal. The lathe holds the pen blank securely while it spins.
This allows for smooth and even shaping. Accessories like chisels and gouges are used for detailed work. Pen turning lathes come in different sizes and features, suitable for various skill levels. Investing in a good lathe enhances craftsmanship and creativity. With practice, anyone can produce stunning, personalized pens.
The Art Of Pen Turning
Pen turning started many years ago. People enjoy making beautiful pens. It is a fun hobby. Many people love handmade pens. They are special gifts. Pen turning has grown in popularity. Many artists and hobbyists share their work online.
Handcrafted pens are unique. Each pen is made with care. Crafting takes time and skill. Commercial production is different. Machines make many pens quickly. These pens are not unique. Handcrafted pens have more value. People appreciate the artist’s effort.
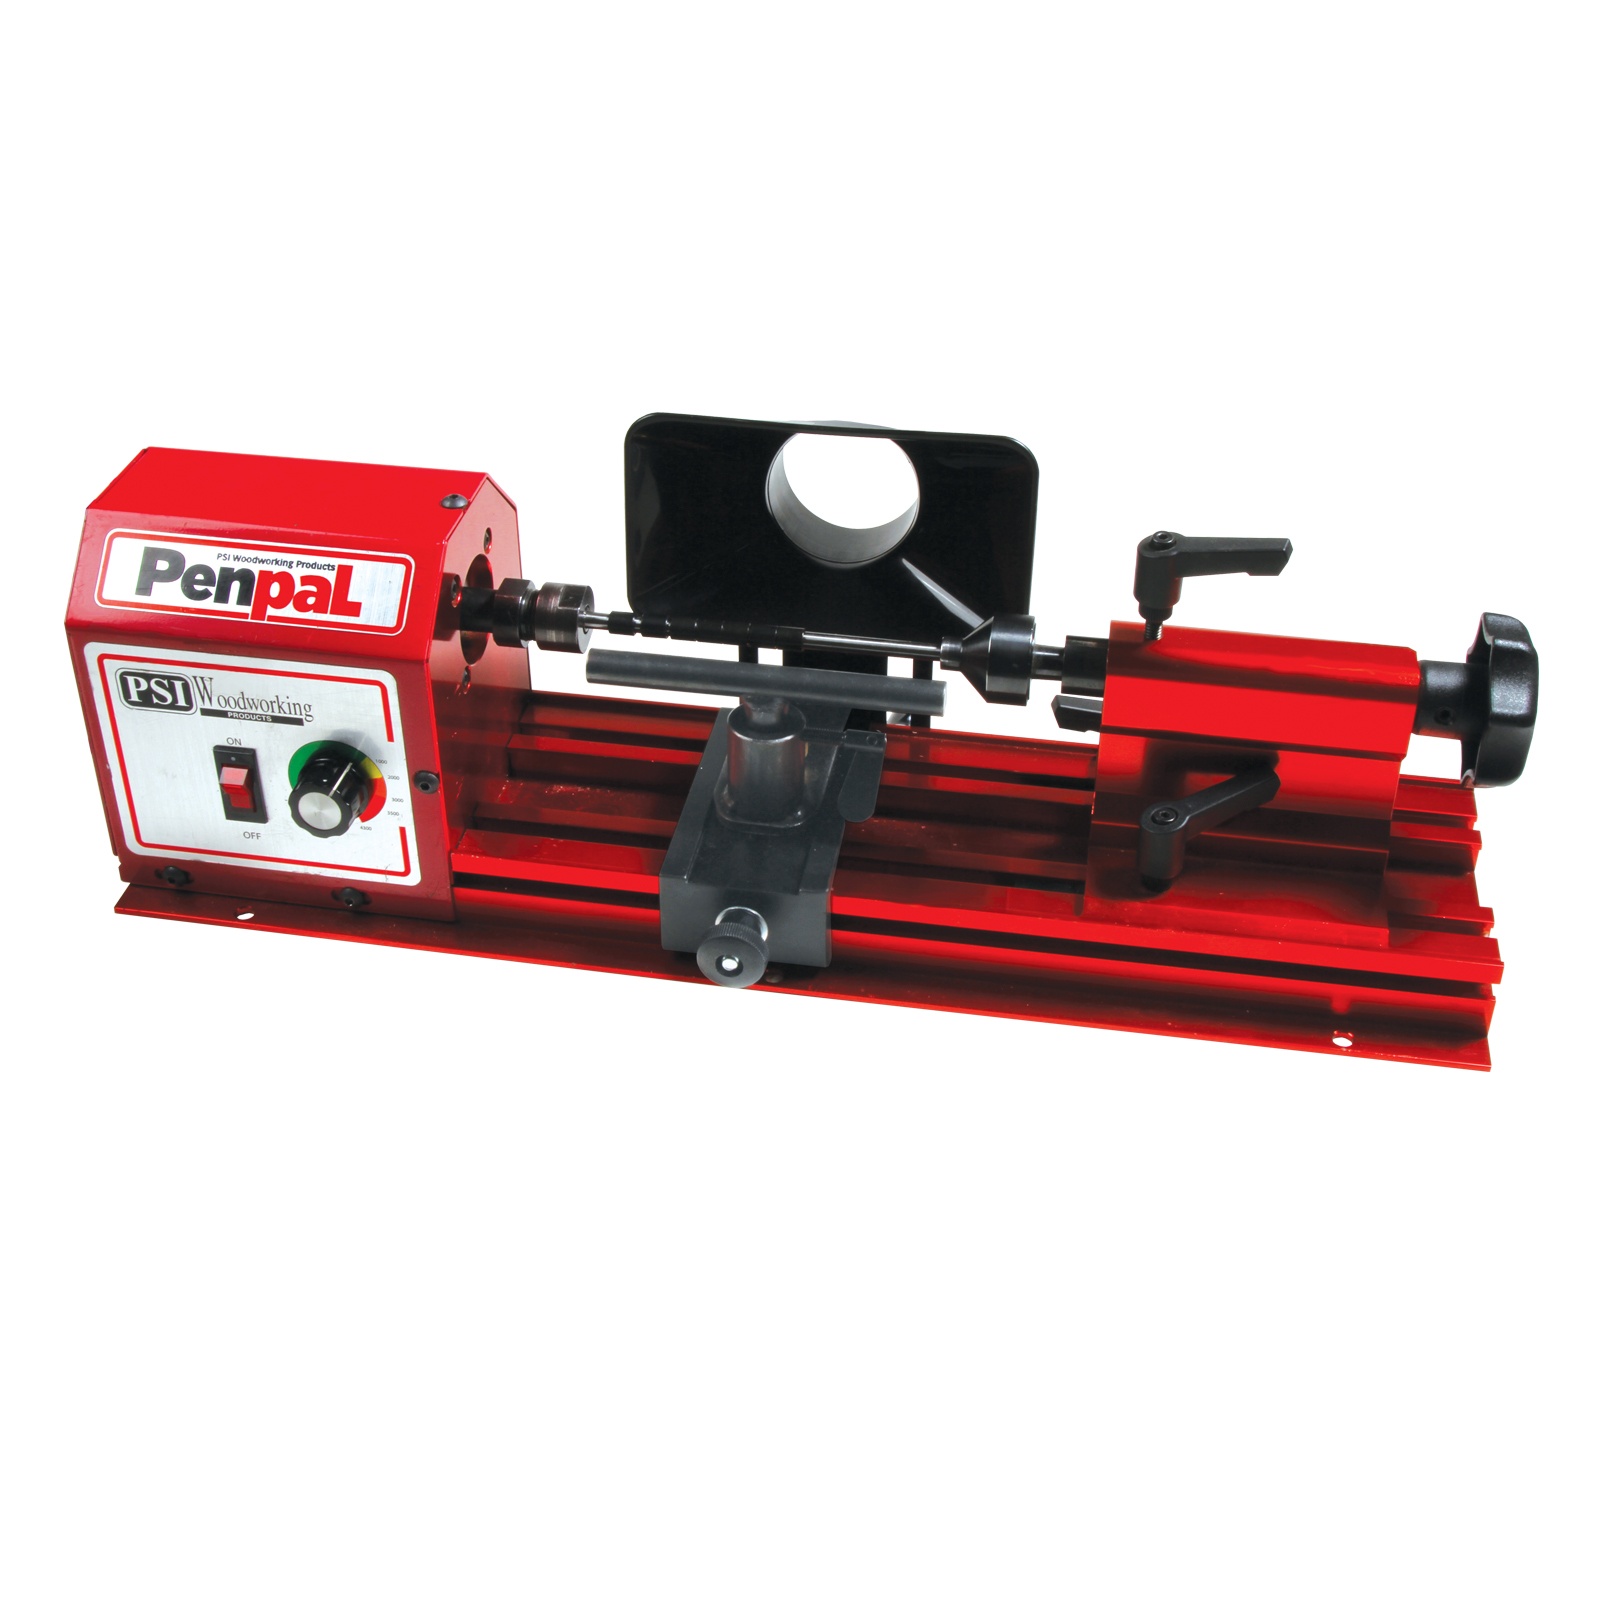
Choosing The Right Lathe
Think about your workspace size. A small lathe fits in small spaces. A bigger lathe needs more room. Measure your area first. This helps in making the right choice. Also, consider the weight. Heavy lathes are hard to move. Lighter ones are easier to handle.
There are different lathes for pen turning. Mini lathes are popular. They are small and easy to use. Midi lathes are bigger. They offer more power and stability. Finally, full-size lathes are the largest. They are good for professional work.
Essential Lathe Accessories
Mandrels hold the pen blanks in place. They help turn the wood smoothly. Using a good mandrel makes the work easier. It also makes the pen look nice. Mandrels come in different sizes. Choose the right one for your pen project.
Bushings are small metal pieces. They fit on the mandrel. Bushings help shape the pen correctly. They ensure each part is the right size. Tailstock Live Centers support the end of the mandrel. They keep it steady. This helps you turn the wood safely and accurately.

Credit: www.youtube.com
Selecting Pen Blanks
Wood pen blanks offer a natural look. They come from different trees. Each type has unique grain patterns. Common choices are oak, maple, and walnut. Wood blanks can be easier to turn on a lathe.
Acrylic pen blanks provide vibrant colors. They have a glossy finish. Acrylics are more durable than wood. They resist water and wear. Beginners may find them harder to work with. Practice makes it easier.
Grain patterns in wood are unique. They vary from tree to tree. Some grains are straight. Others can be wavy or curly. These patterns add character to pens.
Acrylic blanks have different designs. They can mimic natural materials. Some look like marble or stone. Others have swirls of color. These designs catch the eye. They make each pen special.
Tools Of The Trade
Chisels are great for shaping wood. They come in many shapes and sizes. Gouges help in creating curves and hollows. Skew chisels are used for smooth cuts. Each tool has a specific purpose. It is important to choose the right one.
Sharp tools are essential for pen turning. Always use a sharpening stone. Keep the angle consistent while sharpening. This ensures a sharp edge. Use a honing guide for better results. Sharp tools make the job easier and safer.
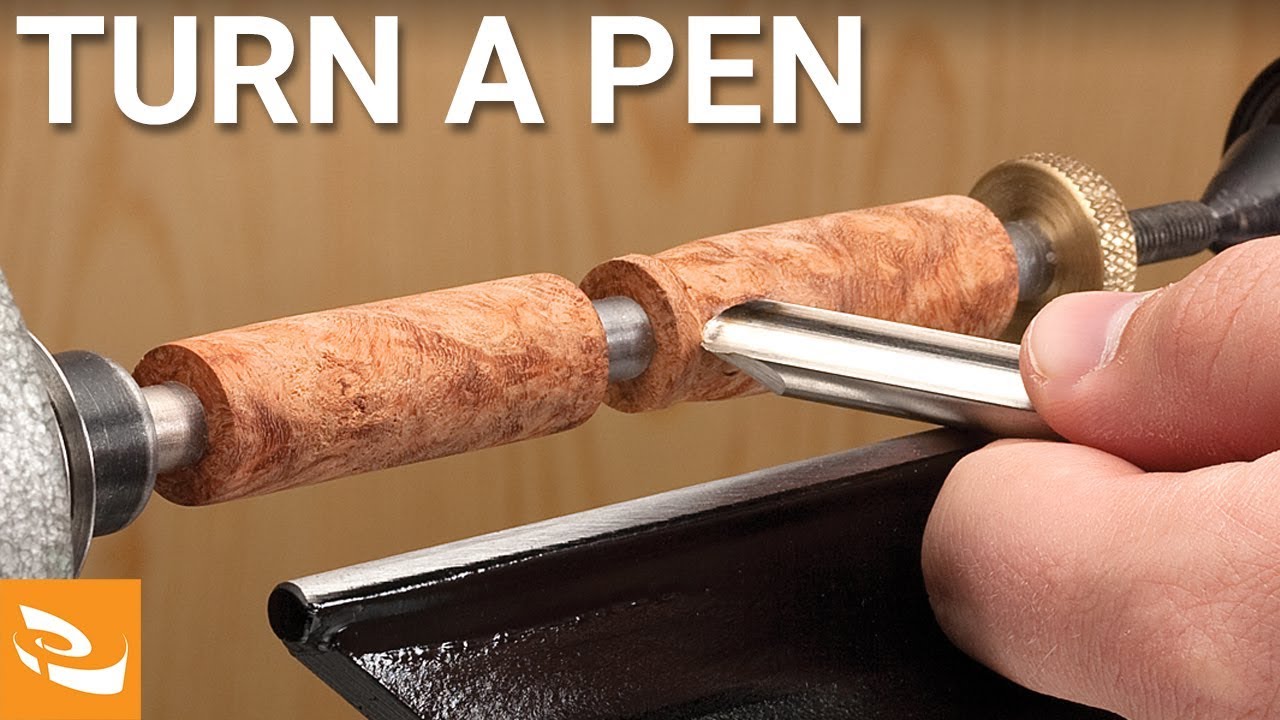
The Pen Turning Process
Start by cutting the blank to the correct length. Make sure it fits the pen kit. Mark the center of the blank. This helps in drilling. Use a drill press to make a hole through the center. Glue the brass tube inside the blank. Allow it to dry fully. Trim the edges of the blank to make them square. This ensures a proper fit.
Mount the blank on the lathe. Turn on the lathe and use a roughing gouge to shape the blank. Smooth the blank with finer tools. Check the shape frequently. Sand the blank starting with coarse grit sandpaper. Progress to finer grits for a smooth finish. Wipe the blank with a clean cloth to remove dust. Apply a finish to protect the wood. Allow it to dry.
Finishing Touches
The pen needs a smooth surface. Start by sanding the pen. Use fine-grit sandpaper. Next, apply the finish. Use a cloth to rub it in. Make sure it covers evenly. Let it dry completely. Repeat if needed for a shiny look. Your pen will look fantastic.
Gather all pen parts. Start with the pen tube. Insert the ink refill. Attach the nib to one end. Fit the clip on the other end. Press all parts firmly. Check for any loose parts. Your pen is now ready to use. Enjoy writing with your new pen.
Advanced Pen Turning Techniques
Segmented pen blanks make pens look unique. Small pieces of wood are glued together. Different woods create amazing patterns. Use various colors for a special look. Precision is key for perfect segments.
Inlay adds beauty to pens. Small pieces of material are set into the wood. Common materials include metal, stone, or shell. Engraving adds personal touches. Special tools carve designs into the pen. Both methods enhance the pen’s appearance.
Troubleshooting Common Issues
Use sharp tools to avoid blowouts. Dull tools can tear the wood. Always turn at a slower speed to prevent splits. Keep your lathe tools properly aligned. This reduces stress on the wood. Make sure the wood is secured tightly. Loose pieces can cause blowouts. Applying CA glue can also help. This strengthens weak wood areas.
Sand the surface to smooth out imperfections. Start with a coarse grit sandpaper. Gradually move to finer grits. This will ensure a smooth finish. Use a wood filler for deep cracks. Apply the filler evenly. Let it dry completely before sanding. Polish the pen after sanding. This adds a professional look. Inspect the pen carefully. Re-sand any rough areas.
Credit: www.youtube.com
Showcasing Your Crafted Pens
Use a wooden stand to show off your pens. It looks elegant and professional. Try a glass case for a more luxurious feel. Acrylic stands are also a good choice. They are clear and let the pens shine. Place the stands in a well-lit area. Good lighting makes your pens look better.
Take clear photos of your pens. Share them on social media. Use hashtags to reach more people. Write short and catchy descriptions. Tell a story about each pen. Offer discounts for bulk orders. Attend local craft fairs. Talk to people about your pens. Give out business cards. Keep your prices fair. People like a good deal.
Credit: www.pennstateind.com
Frequently Asked Questions
What Is The Best Lathe For Pen Turning?
The best lathe for pen turning is the Jet JWL-1015. It’s compact, user-friendly, and perfect for beginners and experts.
What Do I Need To Turn Pens On A Lathe?
To turn pens on a lathe, you need a lathe, pen blanks, bushings, mandrel, lathe tools, sandpaper, and pen kits.
What Speed Is A Pen Turning Lathe?
A pen turning lathe typically operates at speeds between 3,000 to 4,000 RPM. Adjust speed based on material.
What Is A Pen Turner Used For?
A pen turner is used for crafting custom pens from materials like wood or acrylic on a lathe. It shapes and polishes the pen components for a unique, handmade finish.
Conclusion
Pen turning on a lathe offers endless creative possibilities. It’s a rewarding craft for both beginners and experts. With the right tools and techniques, you can create unique, beautiful pens. Dive into this hobby and experience the joy of crafting something truly special.
Enhance your skills and enjoy the process of pen turning.