Table of Contents
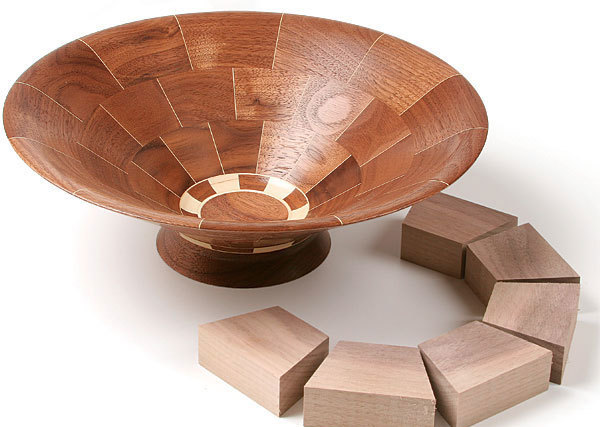
Segmented bowl turning involves gluing multiple wood pieces together to form a bowl. It allows for intricate designs and patterns.
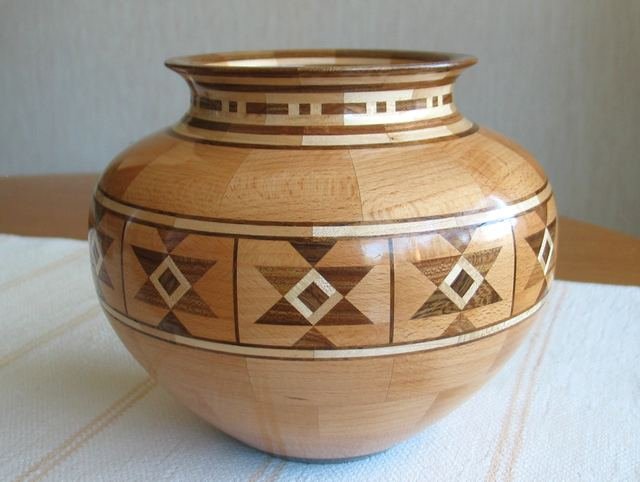
Segmented bowl turning is a captivating woodworking technique that offers endless creative possibilities. Woodworkers glue various wood segments together, creating unique and intricate patterns. This method provides more control over the bowl’s design, enabling the use of contrasting wood types and colors.
The process begins with selecting and preparing the wood, followed by precise cutting and gluing. Once assembled, the blank is turned on a lathe to achieve the desired shape. Sanding and finishing reveal the bowl’s stunning details. Segmented bowl turning is a rewarding craft that combines artistry and technical skill, resulting in beautiful, functional pieces.
The Art Of Segmented Bowl Turning
Segmented bowl turning has a long history. Ancient cultures used this art form. They made beautiful bowls from pieces of wood. Each piece was carefully selected. These bowls were often used in ceremonies. They showed great skill and craftsmanship.
Today, segmented bowl turning is still popular. Artists use modern tools and techniques. They create intricate designs that are stunning. These bowls are often used as decorative pieces. Many people display them in their homes. They add a touch of elegance and history.
Essential Tools And Materials
A lathe is the main tool for bowl turning. It should be sturdy and have a variable speed feature. Choose one that fits your workspace and budget. Small lathes are good for beginners. Professionals might prefer larger models. Always ensure your lathe is in good condition. Safety is very important.
Hardwoods like oak and maple are popular for bowl turning. They are durable and have a beautiful grain. Softwoods can be used but are less durable. Exotic woods offer unique patterns. Alternatives like acrylic and resins can also be used. They give a modern look. Choose materials that match your design and skill level.
Wood glue is essential for joining segments. It creates a strong bond. Cyanoacrylate glue is good for quick fixes. Use clamps to hold pieces in place while the glue dries. For finishes, oil finishes enhance the wood grain. Polyurethane provides a tough, clear coat. Wax can add a soft shine. Always follow the instructions on the product labels.
Designing Your Segmented Bowl
Start with an idea or inspiration. Look at nature, art, or other bowls. Think about shapes, colors, and patterns you like. Use these elements in your design. Mix and match to create something unique. Bold colors and interesting patterns can make your bowl stand out.
Draw your bowl design on paper. Use simple shapes and clear lines. Plan each segment carefully. Decide on the number of pieces and their sizes. Make sure everything fits together perfectly. Good planning helps you avoid mistakes. A well-planned bowl is easier to make and looks better.

Credit: www.youtube.com
Cutting And Preparing Segments
Cutting and preparing segments is crucial in segmented bowl turning. Precision and accuracy ensure seamless assembly of each piece. Proper techniques lead to beautiful, intricate designs that highlight the wood’s natural beauty.
Measuring And Marking
Use a precise ruler for measuring each segment. Mark the wood accurately with a sharp pencil. Ensure each mark is clear and visible. Double-check measurements to avoid mistakes.
Sawing Techniques
Use a fine-tooth saw for clean cuts. Hold the wood firmly while sawing. Follow the marked lines closely. Keep the saw steady to ensure straight cuts. A steady hand ensures better results.
Sanding And Smoothing
Start with coarse sandpaper to remove rough edges. Move to finer grit for a smooth finish. Sand each segment evenly. Ensure all surfaces are smooth and ready for assembly. A smooth surface helps in better bonding.
Assembling The Segments
Apply glue to the edges of each wood piece. Ensure even coverage for a strong bond. Press the pieces together firmly. Wipe away any excess glue. Allow the glue to dry completely. Use high-quality glue for the best results.
Use clamps to hold the pieces tightly together. This ensures a uniform shape. Place clamps evenly around the ring. Adjust the pressure to avoid gaps. Check the alignment before the glue dries. Clamping helps maintain the bowl’s structure.
Inspect the ring for gaps or misalignment. Ensure all segments are secure. Sand any rough edges. Check the shape and smoothness. Make sure the ring is round. A well-assembled ring is crucial for the final bowl.

Credit: www.finewoodworking.com
Shaping The Bowl On The Lathe
Mount the bowl blank on the lathe. Make sure it is secure and tight. Use a faceplate or a chuck. Align the blank properly to avoid wobbling. Check that the lathe speed is appropriate. Start the lathe at a low speed. Gradually increase the speed as needed.
Use sharp tools for turning. Begin with a roughing gouge to shape the bowl. Remove excess wood carefully. Switch to a bowl gouge for finer shaping. Make smooth cuts to avoid tear-out. Keep the tool rest close to the workpiece. Adjust the tool rest as you progress. Sand the bowl after shaping for a smooth finish.
Always wear safety goggles. Protect your eyes from flying wood chips. Use a dust mask to avoid inhaling dust. Keep your fingers away from the spinning blank. Ensure your tools are sharp to prevent accidents. Secure loose clothing and tie back long hair. Maintain a clean workspace to avoid tripping hazards. Turn off the lathe before making adjustments.
Sanding And Finishing Touches
Start with coarse sandpaper. Use 80-grit sandpaper first. Sand the bowl gently. Move to finer grits. Use 120-grit next. Then, use 180-grit sandpaper. Finish with 220-grit. Sanding removes rough spots. This makes the bowl smooth.
Choose a finish for your bowl. Oil finishes are popular. They soak into the wood. This protects the bowl. Another option is lacquer. Lacquer adds a shiny coat. Both types make the bowl look nice. Pick the one you like best.
Apply the finish with a soft cloth. Rub it in gently. Cover the entire bowl. Let it dry completely. Once dry, buff the bowl. Use a clean cloth for buffing. This makes the bowl shine. Repeat if needed for extra shine.
Advanced Segmented Turning Techniques
Different materials add unique textures to segmented bowls. Wood, acrylic, and metal can all be used. Each material requires special tools and techniques. Wood is versatile and comes in various grains and colors. Acrylic offers bright, bold colors and is easy to shape. Metal brings a modern look but needs careful handling. Combining these materials creates stunning, one-of-a-kind pieces. Mixing materials can also improve the bowl’s strength.
Complex patterns enhance the visual appeal of segmented bowls. Precision is key for these intricate designs. Using software can help plan the segments. Symmetry and repetition create harmony in the pattern. Adding features like inlays or carvings adds depth. Experimenting with different shapes and angles can yield surprising results. Always ensure each segment fits perfectly. Sanding each piece smooth before assembly is crucial. This ensures a flawless finish.
Troubleshooting Common Issues
Gaps and misalignments can be frustrating. Check your segments carefully. Make sure each segment is cut accurately. Precise cuts are crucial. Sand the edges to ensure a snug fit. Use clamps to hold segments tightly. Apply glue evenly to avoid gaps. Let the glue dry completely before turning.
Wood movement is natural. Moisture changes cause wood to expand or shrink. Store wood in a dry place. Seal the wood to reduce movement. Use a moisture meter to check wood dryness. Avoid using wet wood for turning. Dry wood is more stable and reliable.

Credit: www.youtube.com
Showcasing Your Finished Work
Use a good camera or smartphone. Natural light is your best friend. Take photos near a window. Avoid direct sunlight. Use a clean background. A white sheet works well. Capture different angles of your bowl. Try close-up shots. Show off the details. Ensure your bowl is the main focus. Edit your photos lightly. Adjust brightness and contrast. Don’t overdo it. Share your photos online. Instagram and Pinterest are great platforms.
Find local crafting groups. Join online forums. Facebook has many groups. Share your work and ask for feedback. Attend local craft fairs. Display your bowls at exhibitions. Meet other crafters. Learn new techniques. Build your network. Participate in online challenges. Gain more exposure. Enter competitions. Win prizes and recognition. Your skills will improve over time.
Frequently Asked Questions
What Is The Formula For A Segmented Bowl?
The formula for a segmented bowl involves calculating the number of segments, segment length, and angle. Use these to design and assemble the bowl accurately.
What Angle Do You Cut A Segmented Bowl?
Cut each segment at a 15-degree angle for a 12-segment bowl. Adjust angle based on the number of segments.
What Is The Direction Of The Wood Grain For Bowl Turning?
For bowl turning, orient the wood grain parallel to the lathe bed. This minimizes tear-out and ensures smooth cuts.
What Size Lathe For Bowl Turning?
For bowl turning, a lathe with a swing over the bed of 12 inches or more is ideal. A 1 HP motor provides sufficient power.
Conclusion
Segmented bowl turning offers endless creativity and satisfaction. This craft allows for unique, beautiful wooden pieces. Start your journey today and experience the joy of woodworking. Embrace the process, and let your imagination guide you. Happy turning!
