Table of Contents
Turning wooden pens involves shaping and finishing wood into functional and decorative writing instruments using a lathe. This craft combines woodworking skills with creativity.
Wooden pen turning is a popular and rewarding hobby. It allows enthusiasts to create unique, handcrafted writing tools. The process starts by selecting a wood blank, which is then shaped on a lathe. Tools like gouges and chisels help achieve the desired pen profile.
Sanding and polishing ensure a smooth finish. Adding a durable finish, such as lacquer or wax, enhances the wood’s appearance and longevity. Each pen can be customized with various wood types and designs, making it a perfect gift or personal keepsake. The satisfaction of crafting a beautiful, functional item is unmatched.

Credit: www.artofturning.com
Introduction To Turning Wooden Pens
Crafting wooden pens offers a unique blend of creativity and precision. This engaging hobby transforms simple wood into exquisite writing instruments. Perfect for artisans seeking a rewarding and skillful pastime.
The Allure Of Handcrafted Pens
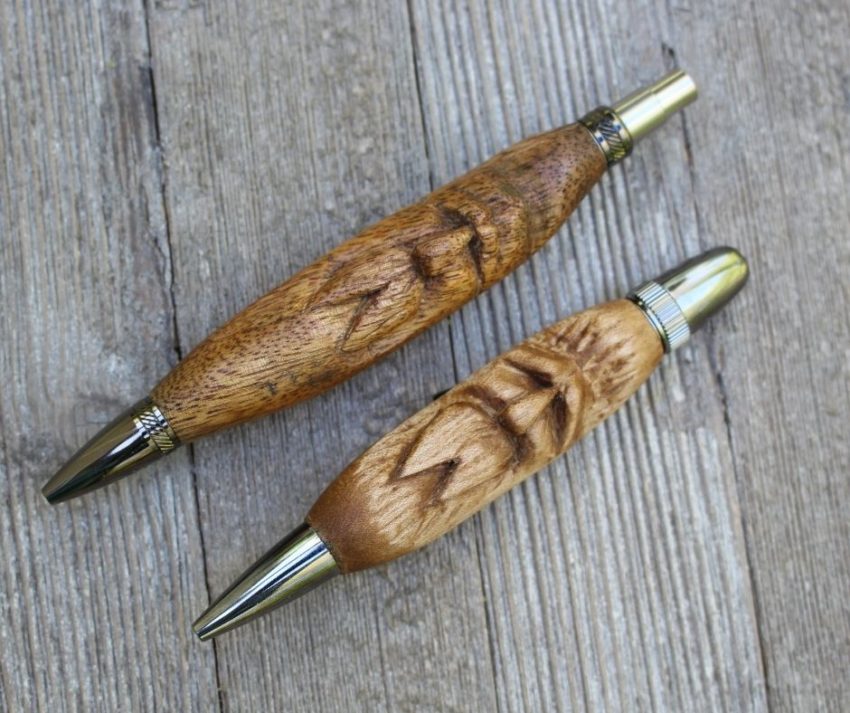
Handcrafted wooden pens are unique. Each pen tells a story. They are made with care and precision. The process involves turning wood on a lathe. This creates smooth and beautiful pens. They are perfect for gifts or personal use. The feel of a wooden pen is special. It offers a warm and natural touch.
Brief History Of Pen Turning
Pen turning started many years ago. People used basic tools at first. Over time, the craft evolved. Better tools and techniques emerged. Today, pen turning is a popular hobby. Many enjoy creating their own pens. The history of pen turning is rich and interesting. It shows the growth of a simple craft into a beloved art form.
Essential Tools For Pen Turning
Crafting wooden pens requires essential tools like a lathe, chisels, and mandrels. Precision instruments such as calipers and sandpaper ensure a perfect finish. High-quality pen kits complete the process for stunning results.
Choosing The Right Lathe
A mini lathe is ideal for turning wooden pens. It is small and easy to use. Make sure the lathe has variable speed control. This feature helps with different types of wood. Safety is important, so wear protective gear. Always keep your workspace clean and organized.
Selecting Pen Kits And Blanks
Pen kits come in different styles and materials. Choose a kit that fits your taste. Wood blanks are pieces of wood used for the pen body. Select blanks with interesting grain patterns. This makes your pen unique. Acrylic blanks are also popular. They offer vibrant colors and designs. Make sure to match the blank with the pen kit. This ensures a perfect fit.
Materials For Wooden Pens
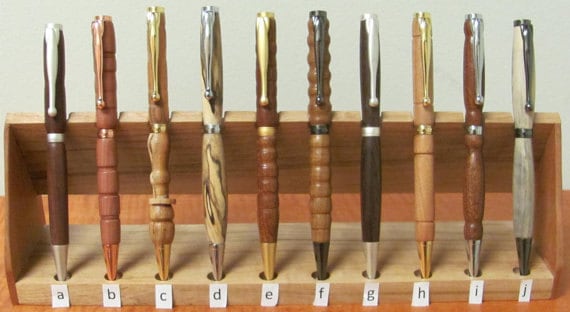
Many types of wood are good for pen turning. Walnut is dark and strong. Maple is light and easy to shape. Cherry has a rich color and smooth grain. Rosewood is dense and has a nice fragrance. Olive wood has beautiful patterns and is very durable.
Other materials can be used for pens too. Acrylic is colorful and shiny. Metal inlays add a unique touch. Bone and horn give a rustic look. Shell pieces can create a shimmering effect. Stones like turquoise can be inlaid for a special design.
Mastering The Craft
Crafting wooden pens transforms simple materials into elegant writing instruments, blending artistry with functionality. Skilled hands shape each pen, highlighting the natural beauty of the wood.
Basic Pen Turning Techniques
Start with a good quality wood blank. Make sure it is dry and free of cracks. Mount the blank securely on the lathe. Use a sharp gouge to shape the pen. Keep your tools sharp for clean cuts. Sand the pen smoothly with different grit sandpapers. Apply a finish to protect the wood and enhance its look.
Advanced Decorative Methods
Inlay techniques add beauty. Use materials like brass, aluminum, or stone. Segmented designs involve gluing different woods together. Burning designs with a pyrography tool creates texture. Dyeing and staining can add vibrant colors. Resin casting allows embedding objects like flowers or shells. Engraving personalizes the pen with names or logos.
Design Principles For Elegant Pens
Creating a wooden pen requires good proportions. The pen should feel balanced in the hand. A thick pen might look strong but may feel heavy. A thin pen can look sleek but may feel fragile. Balance is key for comfort and aesthetics. Make sure the pen’s length and width complement each other.
Wood comes in many colors and patterns. Some woods have natural swirls and lines. These patterns add character to the pen. Light woods like maple give a clean look. Dark woods like walnut feel rich and elegant. Choose colors that match the pen’s style. Mixing different woods can also create a unique design.
Finishing Touches For Durability And Shine
Choosing the right finish is crucial. It protects the wood and makes it shine. Some popular finishes are shellac, lacquer, and polyurethane. Shellac is easy to apply and dries quickly. Lacquer provides a tough and durable surface. Polyurethane offers a high level of protection. Each finish has its own benefits. Consider the final look you want.
Applying the finish correctly ensures a smooth surface. Start by sanding the pen with fine-grit sandpaper. This removes any rough spots. Apply the finish in thin coats. Let each coat dry before adding the next. Use a soft cloth to apply shellac or oil finishes. Spray lacquer for an even coat. Sand lightly between coats for the best results.
Troubleshooting Common Issues
Cracks and splits in wooden pens are common. Use stable wood to prevent this. Dry your wood properly before turning. Avoid sharp tools that might cause stress. Turn the wood slowly to avoid heat buildup. Apply a steady pressure while turning. This helps in keeping the wood intact. Seal the wood with a good finish to prevent cracks.
Imperfections can ruin a pen’s look. Sand the pen carefully to remove rough spots. Use fine-grit sandpaper for a smooth finish. Fill small holes with wood filler. Choose a matching color for the filler. Sand the filled area after it dries. Apply a high-quality finish for a polished look. This makes the pen look professional.

Credit: www.fouroakscrafts.com
From Hobby To Business
Showcase your pens on social media. Use platforms like Instagram and Facebook. Post high-quality photos of your pens. Write short, catchy descriptions. Share the process of making each pen. Engage with your audience by replying to comments. Join groups related to woodworking and pens.
Create a website to sell your pens. Use a simple design. Make sure it is easy to navigate. Include a section for customer reviews. Offer discounts for first-time buyers. Email past customers about new products. Attend craft fairs and markets. Bring business cards to hand out.
Think of a unique name for your brand. Design a logo that stands out. Use the same colors and fonts everywhere. This creates a consistent look. Share your story about why you make pens. People love to know the person behind the product.
Collaborate with other artisans. This can help you reach new customers. Offer limited-edition pens. These can be special gifts or unique designs. Keep your quality high. Good reviews will bring more buyers.
Joining The Community Of Pen Turners
Joining a forum helps you learn new techniques. Many pen turners share their tips and tricks. Forums are great for asking questions. You can find answers from experienced pen turners. Some forums have photo galleries. These galleries showcase beautiful pens. Joining a forum can be very inspiring. You may also find local groups. These groups often meet in person. Sharing ideas with others can improve your skills.
Exhibitions are wonderful for showcasing your wooden pens. Many events are held annually. You can see different styles and techniques. Competitions offer a chance for recognition. Winning a competition can boost your confidence. It can also increase your reputation. Some competitions have prizes. These can be tools or materials for pen turning. Exhibitions and competitions are great for networking. You can meet other pen turners and learn from them.

Credit: www.etsy.com
Continuing The Journey
Keeping the creative spark alive is crucial. Nature often provides endless inspiration. Visit parks and forests for new ideas. Sketching designs can also help. Join online forums and groups. Sharing ideas keeps the creativity flowing.
Workshops offer hands-on learning. They provide valuable tips and tricks. Meeting other enthusiasts is motivating. Experts often share their secrets. This knowledge can improve your skills. New techniques keep the journey exciting.
Frequently Asked Questions
What Is The Best Wood For Turning Pens?
The best wood for turning pens includes stabilized burl, cocobolo, and ebony. These woods offer durability, beauty, and fine grain.
What Is Needed To Turn Pens?
To turn pens, you need a lathe, pen blanks, turning tools, bushings, and a pen mandrel. Use sandpaper for smooth finishing.
What Rpm For Pen Turning?
Turn your pen blanks at 3,000 to 4,000 RPM. Ensure smooth and efficient cutting. Always prioritize safety.
Which Type Of Finish Is Recommended For Wooden Pens Turned On The Lathe?
For wooden pens turned on a lathe, a friction polish or CA glue finish is recommended. These finishes enhance shine and durability.
Conclusion
Crafting wooden pens combines creativity and skill, resulting in unique, personalized items. This rewarding hobby offers endless possibilities for design. Start your pen-turning journey today and enjoy the satisfaction of creating beautiful, functional art. Embrace the process and watch your craftsmanship evolve with each project.
Happy turning!
